


A Kenyan resident possessing as a registered taxpayer with a Personal Identification Number (PIN) issued by the principal tax administrator known as the Kenya Revenue Authority (KRA) must file tax returns financial year. PIN holder have until the end of June to complete your income tax returns. An income tax return contains information on your income, expenses, and other relevant financial information. As for those who don’t have a job or any sources of income, you are required to complete the NIL return.
The Kenyan iTax system lets you file different types of tax returns, depending on your situation. This includes income tax for individuals, businesses (corporations and partnerships), and indirect taxes like VAT and excise duty. Basically, you choose the return that matches your tax obligations and file it through iTax. In this article, we will discuss how to file KRA Nil returns online or iTax filing.
Process of Filing NIL Returns on KRA iTax
If you have no income sources or transactions to report for the entire financial year, you are eligible to file Nil return. To do this follow the following simple steps.
Read: How to File KRA Income Tax Returns
1. Open your iTAX account where you will enter your KRA number. This is entered on the field labelled PIN/Username. Then you will enter your Password for the iTax account. A simple calculation is required to ensure you aren’t a bot under Security Stamp.
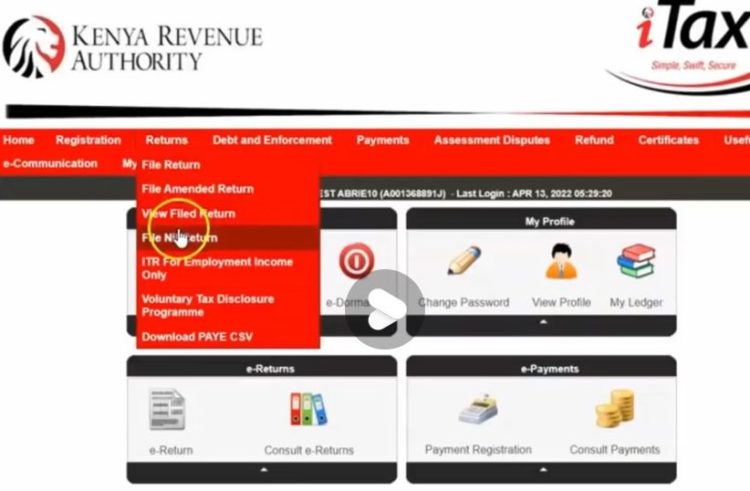
2. Then you will enter the official iTax account. Once you get to the official iTax account, there is a Menu option labelled Returns with a drop-down list. Under the drop down select File Nil Returns
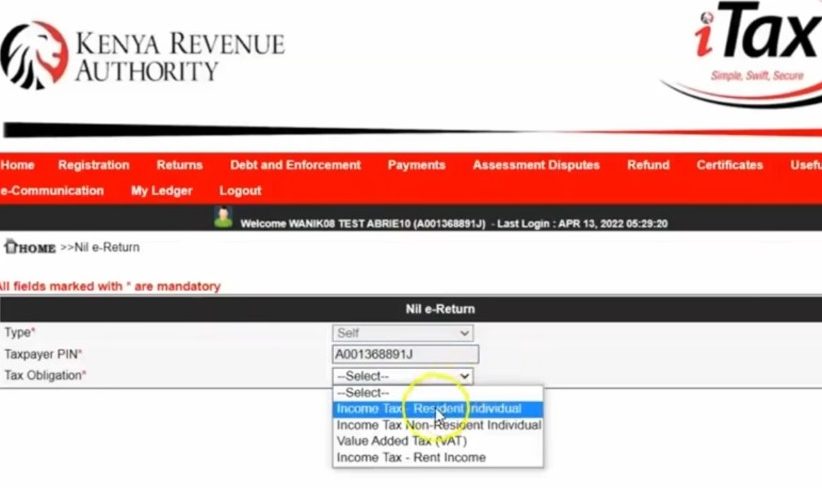
3. Once you click there, it will take you to another box. Your KRA PIN Number will be prefilled but you will be required to enter Income Tax- Resident Individual. This is under the field labelled Tax Obligation. Click Next after selecting this option.
5. It will take you to a page where the year in which you as a registered taxpayer is expected to receive his or her return. You will click Submit.
6. Once you click Submit, it will take you to a new page where you will see Return Receipt Generated. Click Download and the receipt will be sent to your device download folder as a PDF document.


