Rafiki by Securex needs no introduction, having talked about it a couple of weeks ago about its operations and products, albeit briefly. The company has been offering security services for a long time. At the moment, it serves customers in Kenya and Uganda.
Securex has since launched affordable home security products. The entire catalogue of the security sensors and other smart devices is extensive, so you might want to check them out at securexafrica.com.
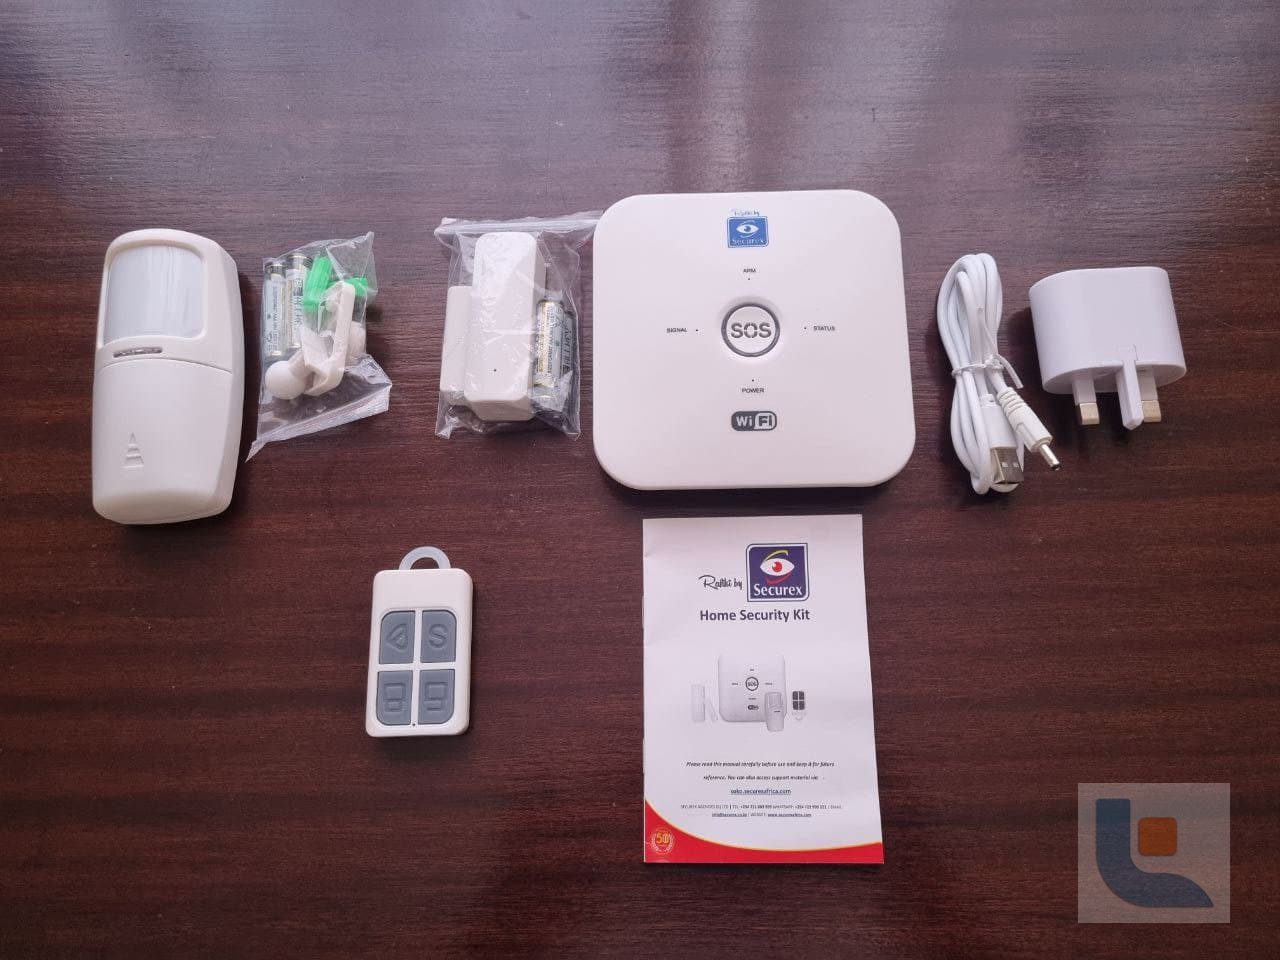
What we have in the house is a basic kit that ships with an alarm panel, motion sensor, magnetic contact, a remote control, mounting materials (for the motion sensor) and a power adapter and cable.
So, you have made your purchase (the kit costs KES 7500), and want to set it up.
How do you go about it?
Good question, because we are going to help you with that.
Magnetic Contact

The device should be installed in a door or window that you think is the most vulnerable point that an intruder can use to break into your house. We only have a piece here, so for those with multiple points, you might want to pick more of these sensors.
The contact is made of two devices: a tiny magnet and a slightly bigger sensor. They should be less than 10 mm apart, so you might want to take note of that.
In our case, we installed at our kitchen door, but we could as have used the main door.
One thing we noted is that the magnetic contact is rather weak, and slides down the its attachment point. At the same time, it really did not stick with the sensor, but we trying to find out if we have not done it right, considering the two devices do not have any mounting materials.
NOTE: The transmission distance is less than 100 metres.
Motion Sensor

This is a simple one, and can be set up and installed in less than 10 minutes.
First, you power it with the included AAA batteries. There is a small extra attachment piece that slides at its back.
After setting them up, choose the best location where you think the device will serve you right in terms of detecting suspicious motions.
Your front door, for instance, is a good choice. And so is you back, kitchen door or balcony area.
Securex also gives the following guidelines:
- Do not let the PIR motion sensor face glass windows, a big object that is easy to swing, or cold and heat air vent/source.
- Any other kind of interference such as furniture.
- Do not install two motion detectors in the same area because they will interfere with each other.
Note: Detection distance is less than 8 metres.
Alarm Panel

This is the control centre of the devices, and should set up as instructed. However, the instruction given by Securex may not be clear, but you do not need to work about that.

- First, download the Rafiki by Securex app from Play or App Store.
- Create an account. Log into it.
- Now it is time to connect the panel to your Wi-Fi connection. First, make sure your password has letters only; no numbers or special characters. Secondly, ensure it is a 2.4 Ghz connection because the panel does not work on 5 Ghz. This perhaps should be the most important point to consider before you even purchase the kit.
- With that out of the way, connect the Alarm panel to power. Also, make sure it is turned on (there is a switch at the back).
- Adding the panel to your network is easy. Open the Securex by Rafiki app, choose Auto Scan, and configure the panel with prompts. Also, as it scans, press the CDDE button at the back of the panel for three secs. The panel will then beep six times. When the panel blinks, it then means it is on Learning Mode. Release the CDDE button then. Afterward, the panel will flash quickly, meaning you are in the network configuration state.
- If that does not work, then add the panel manually to your network. Choose the ‘Add Manually’ option, choose ‘Security and Sensors’, then ‘Alarm Wi-Fi’, and then configure the system. Similar to the first approach, hold the CDDE button for three seconds, and wait for the 6 beeps to enter Learning Mode.
Successful connection means that you can add the sensor to the panel and control them from there, including arming, disarming, and viewing them, to mention a few.
Add Your Sensors
Remember, you set up a PIR motion sensor and magnetic contact on your door/window. The devices can only work if they are linked to the alarm panel.
Adding them is the easiest part of this exercise: go to the app, choose the panel which you want to add the sensor to, select ‘Device’, then ‘Fast search’and then press any button on your remote to power the detectors. The motion sensor, by the way, has an ON/OFF switch, so make sure it is on.
After adding them, you can rename the sensors based on what they do, and their location.
And that’s just it.
Note that the steps may be overwhelming for some. Securex says that customers should not worry because it can help them set the kit up.
We also think the instructions were more straightforward. For instance, the magnetic sensor installation guide is vague and of no help to those who want to set the kit up by themselves.
We will be testing the kit and give you a detailed feedback in due course.


